Have you ever tried to combine tomatoes and coconut in one dish?
Can you imagine combining them into a cake? A sweet one? .... Nope? No way?
Well, after you try this recipe, I bet this will become one of your favorite cakes ever!
Can you imagine combining them into a cake? A sweet one? .... Nope? No way?
Well, after you try this recipe, I bet this will become one of your favorite cakes ever!
When I first read this recipe some time ago, I was like "Sweet cake with tomatoes?! No, thanks!" :) But then I needed some eggless and dairy free dessert for a holiday dinner we had at our home during fasting days, and I recollected this cake.
And I decided to do what I usually do: try some new, questionable recipe when I actually need a proven one... :)
And it absolutely blew our minds!!!
I changed the recipe a bit since then and adjusted it to our taste. The original one had thicker cake sheets and less filling, but we liked it more the opposite way: thin cake with lots of filling! I will write both version here, in case you like the authentic one better.
So, here's what you'll need...
for the cake sheets:
for the filling:
And I decided to do what I usually do: try some new, questionable recipe when I actually need a proven one... :)
And it absolutely blew our minds!!!
I changed the recipe a bit since then and adjusted it to our taste. The original one had thicker cake sheets and less filling, but we liked it more the opposite way: thin cake with lots of filling! I will write both version here, in case you like the authentic one better.
So, here's what you'll need...
for the cake sheets:
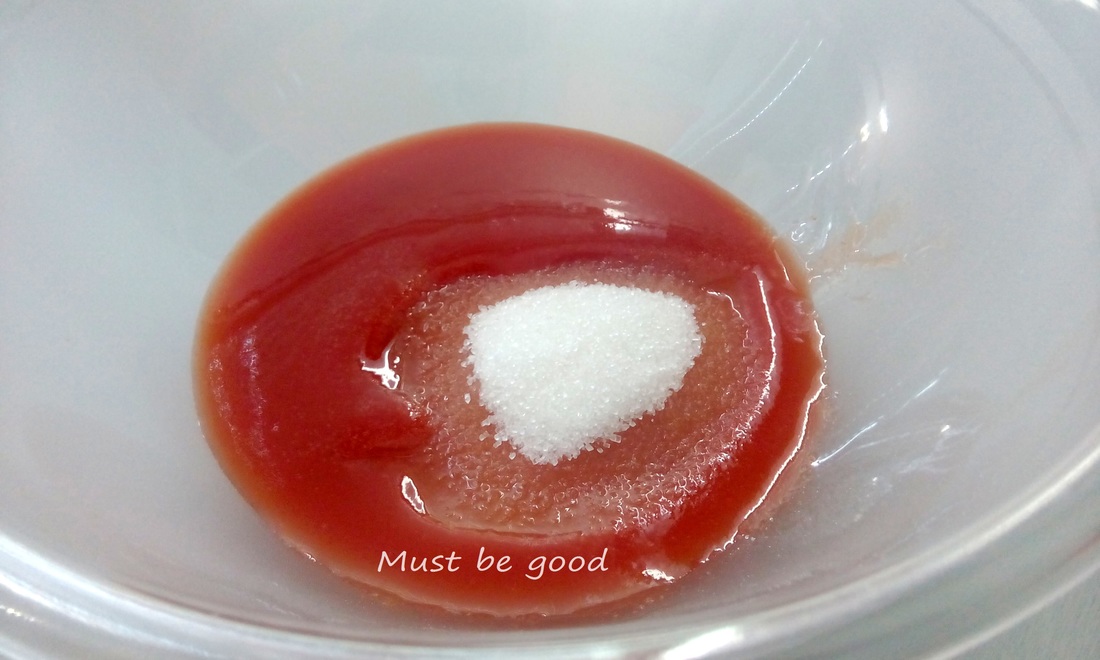
- 6 tablespoons tomato sauce
- 6 tablespoons sugar
- 6 tablespoons oil
- approx. 15 tablespoons flour
- 1/2 teaspoon baking soda
for the filling:
- 250 g sugar
- 6 tablespoons cornstarch or flour
- 100 g chocolate (or 50 g dark and 50 g white)
- 250 g butter or margarine (softened)
- 100 g desiccated coconut
- 150 g minced walnuts
- 600 ml water (or milk)
Directions:
- First, prepare the filling as you'll spread it on the cake once it's baked.
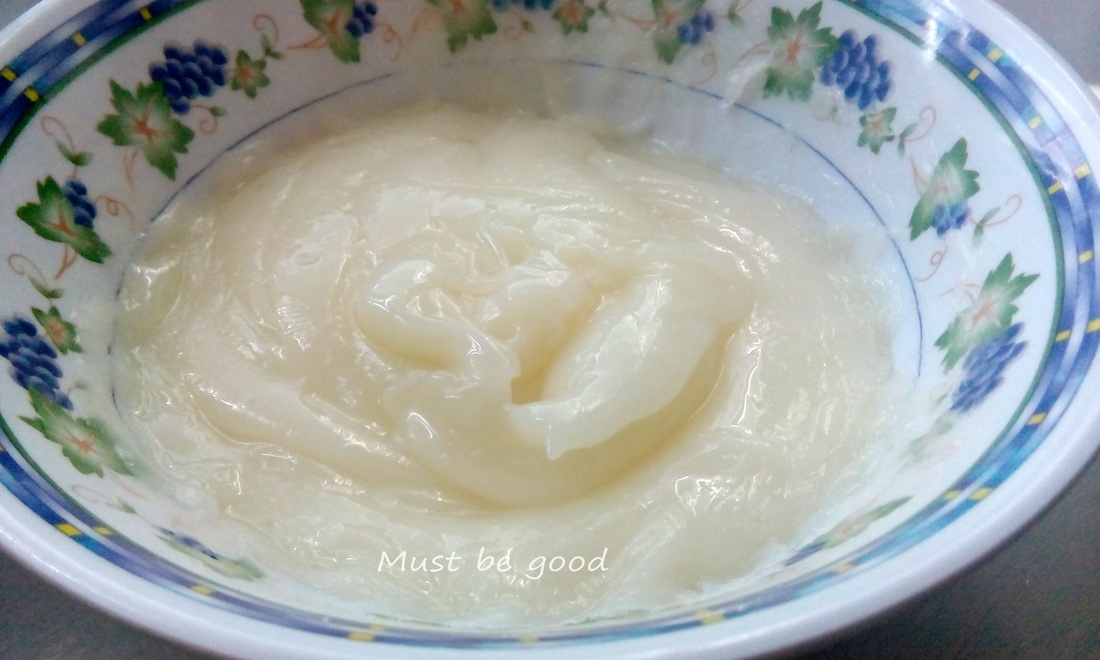
Combine cornstarch with 100 ml of cold water until homogenized.
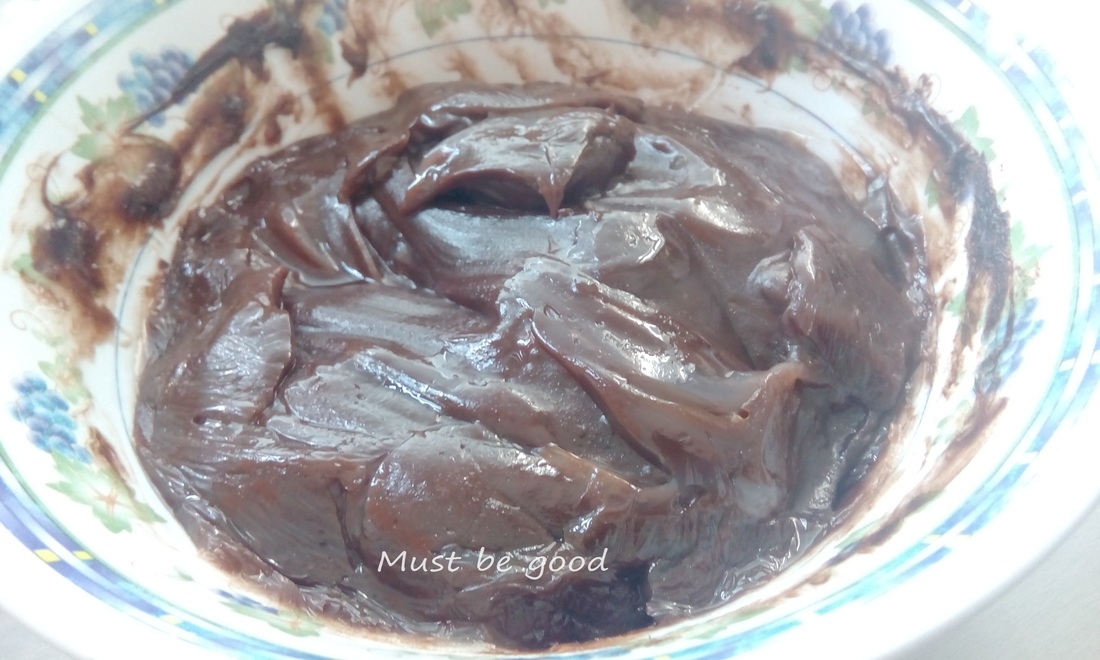
Put the remaining 500 ml of water into a small pot, add sugar and bring it to boiling over medium heat. Let it boil for 5 minutes, and then pour in the cornstarch. Stir constantly for 30-40 seconds, until the mixture thickens like pudding. Remove from fire. - Now, the original recipe calls for dark chocolate only, but I decided to change it a bit this time, so I made two different-colored fillings.
Add crushed chocolate into the cooked cornstarch pudding once you remove from fire OR divide it into two equal parts and add 50 g of dark chocolate into the first, and 50 g of white chocolate into the second part.
Cover the filling with some plastic foil and let them cool completely before further use.
|
|
|
3. Beat butter until fluffy. Then, add cooled pudding and mix again until fully homogenized.
If you have made two different puddings, divide butter equally between them and mix separately. 4. Divide the cream into two equal parts. Stir in coconut into the first one, and minced walnuts into the second. I added coconut into the white cream, and walnuts into the dark one. Filling is now ready. |
|
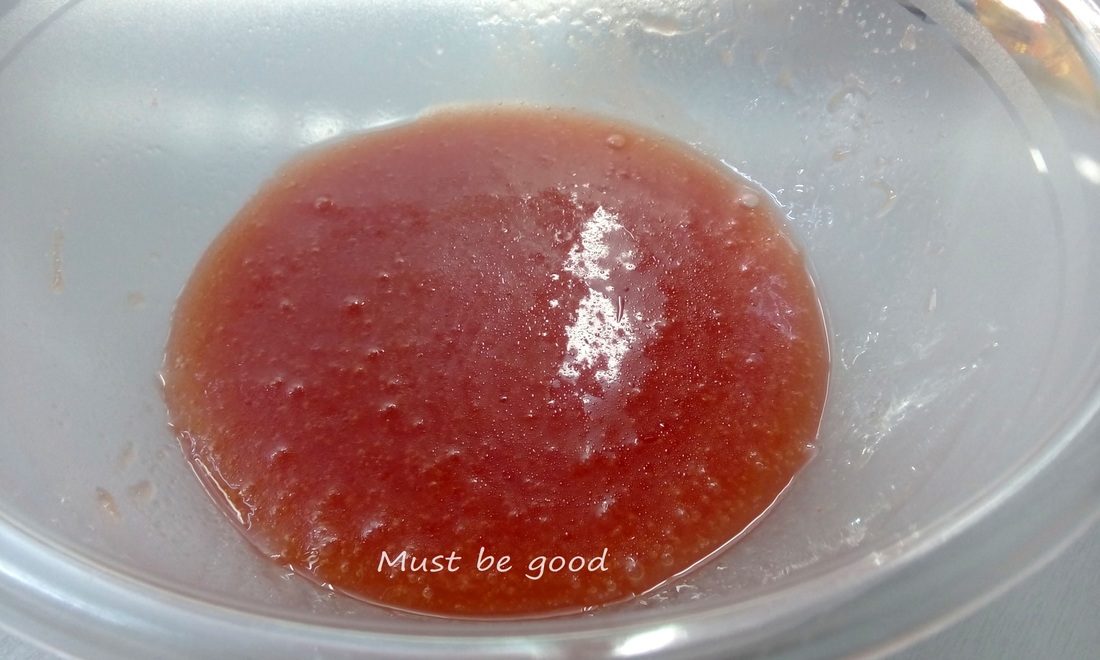
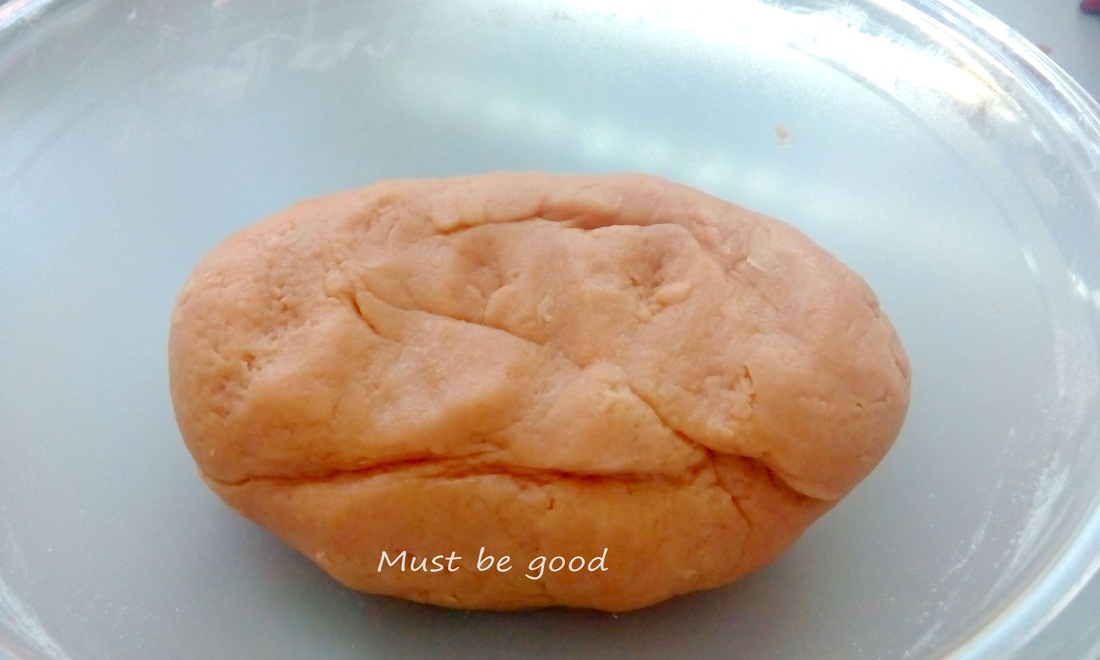
5. Now, you can start preparing the cake sheets: whisk together tomato sauce and sugar until sugar melts. Then, stir in oil. At the end add baking soda and flour and knead until you get a soft, but non-sticky dough. I used exactly 15 Tbsp of flour, but you may need a bit more or less, depending on the flour itself.
|
|
|
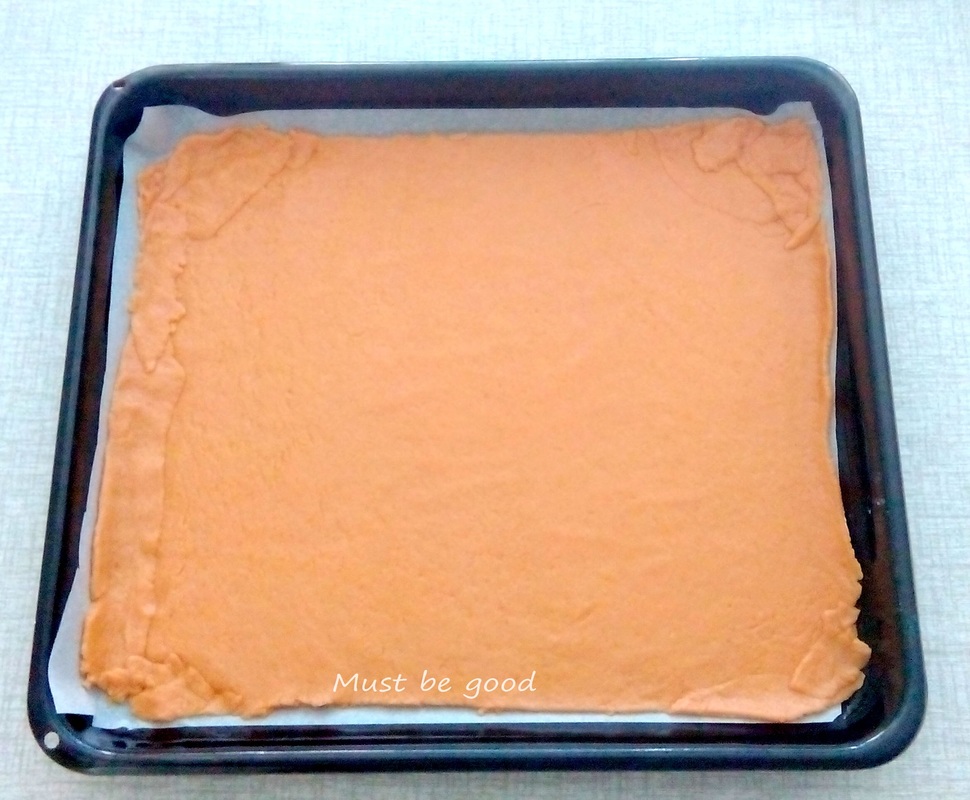
6. Roll out the dough onto a lightly floured surface to get a thin crust, measured approx. 30x30cm. Place it on a baking pan covered with parchment paper and bake into a preheated oven at 180°C for 5-6 minutes.
Don't bother if you can't make a regular-shaped crust. Patch it here and there if you need: it won't show when cake is finished... :)
Don't bother if you can't make a regular-shaped crust. Patch it here and there if you need: it won't show when cake is finished... :)
|

|
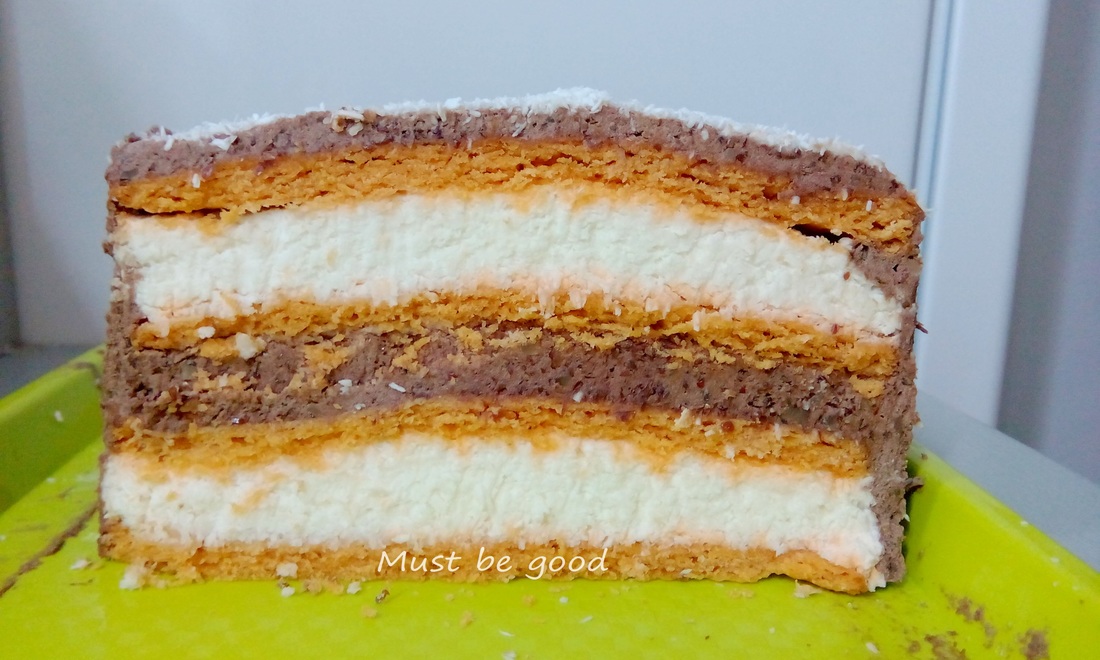
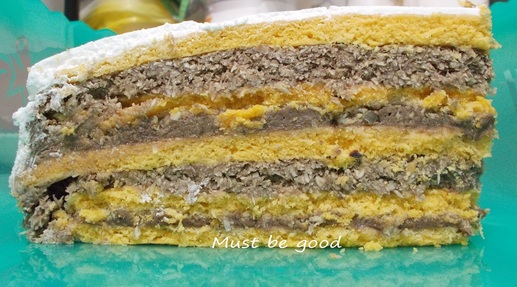
7. Once you take the cake out from the oven, cut it into 4 equal parts and start assembling it the following way:
8. Then, cover and decorate the cake with some whipped cream, fondant, your favorite icing, or just sprinkle it with some more coconut, walnuts or shredded chocolate.
Note: As I mentioned, the original recipe had thicker cake sheets with less filling. This is how that version looked like the first time I made it...
- 1st cake sheet - half of the coconut filling
- 2nd cake sheet- half of the walnut filling
- 3rd cake sheet - the remaining half of the coconut filling
- 4th cake sheet - cover the whole cake with the remaining walnut filling.
8. Then, cover and decorate the cake with some whipped cream, fondant, your favorite icing, or just sprinkle it with some more coconut, walnuts or shredded chocolate.
Note: As I mentioned, the original recipe had thicker cake sheets with less filling. This is how that version looked like the first time I made it...
If you decide to make this one, you'll need to double all cake sheet ingredients (so: 12 Tbsp tomato sauce, 12 Tbsp sugar, 12 Tbsp oil, approx. 30 Tbsp flour and 1 tsp baking soda).
Then, you should divide the dough into 5 equal parts and bake 5 separate sheets. Assemble it as described above, but this time you'll finish with the last, 5th sheet instead with filling.
Let the cake stand for 1-2 days at room temperature before serving, so that all flavors mix together. Then cut it at your convenience.
Note that it can last for up to a week. I would recommend that you keep it at room temperature rather than in the fridge, so that the filling stays creamy and soft.
Enjoy and bon appétit!